Introduction
When developing .NET applications that interact with Azure services, it’s common practice to make use of the Azure.Identity library. This library simplifies the process of authenticating with Azure services by providing a set of credential classes that can be used to obtain access tokens. The simplest and most common way to authenticate is by using the DefaultAzureCredential class, which tries several different credential types in order until one succeeds.
How DefaultAzureCredential works
There are several ways to authenticate with Azure services, such as using a client secret, managed identity, or Azure CLI credentials. DefaultAzureCredential is really awesome as we can generally use the same code to authenticate in different environments 😎
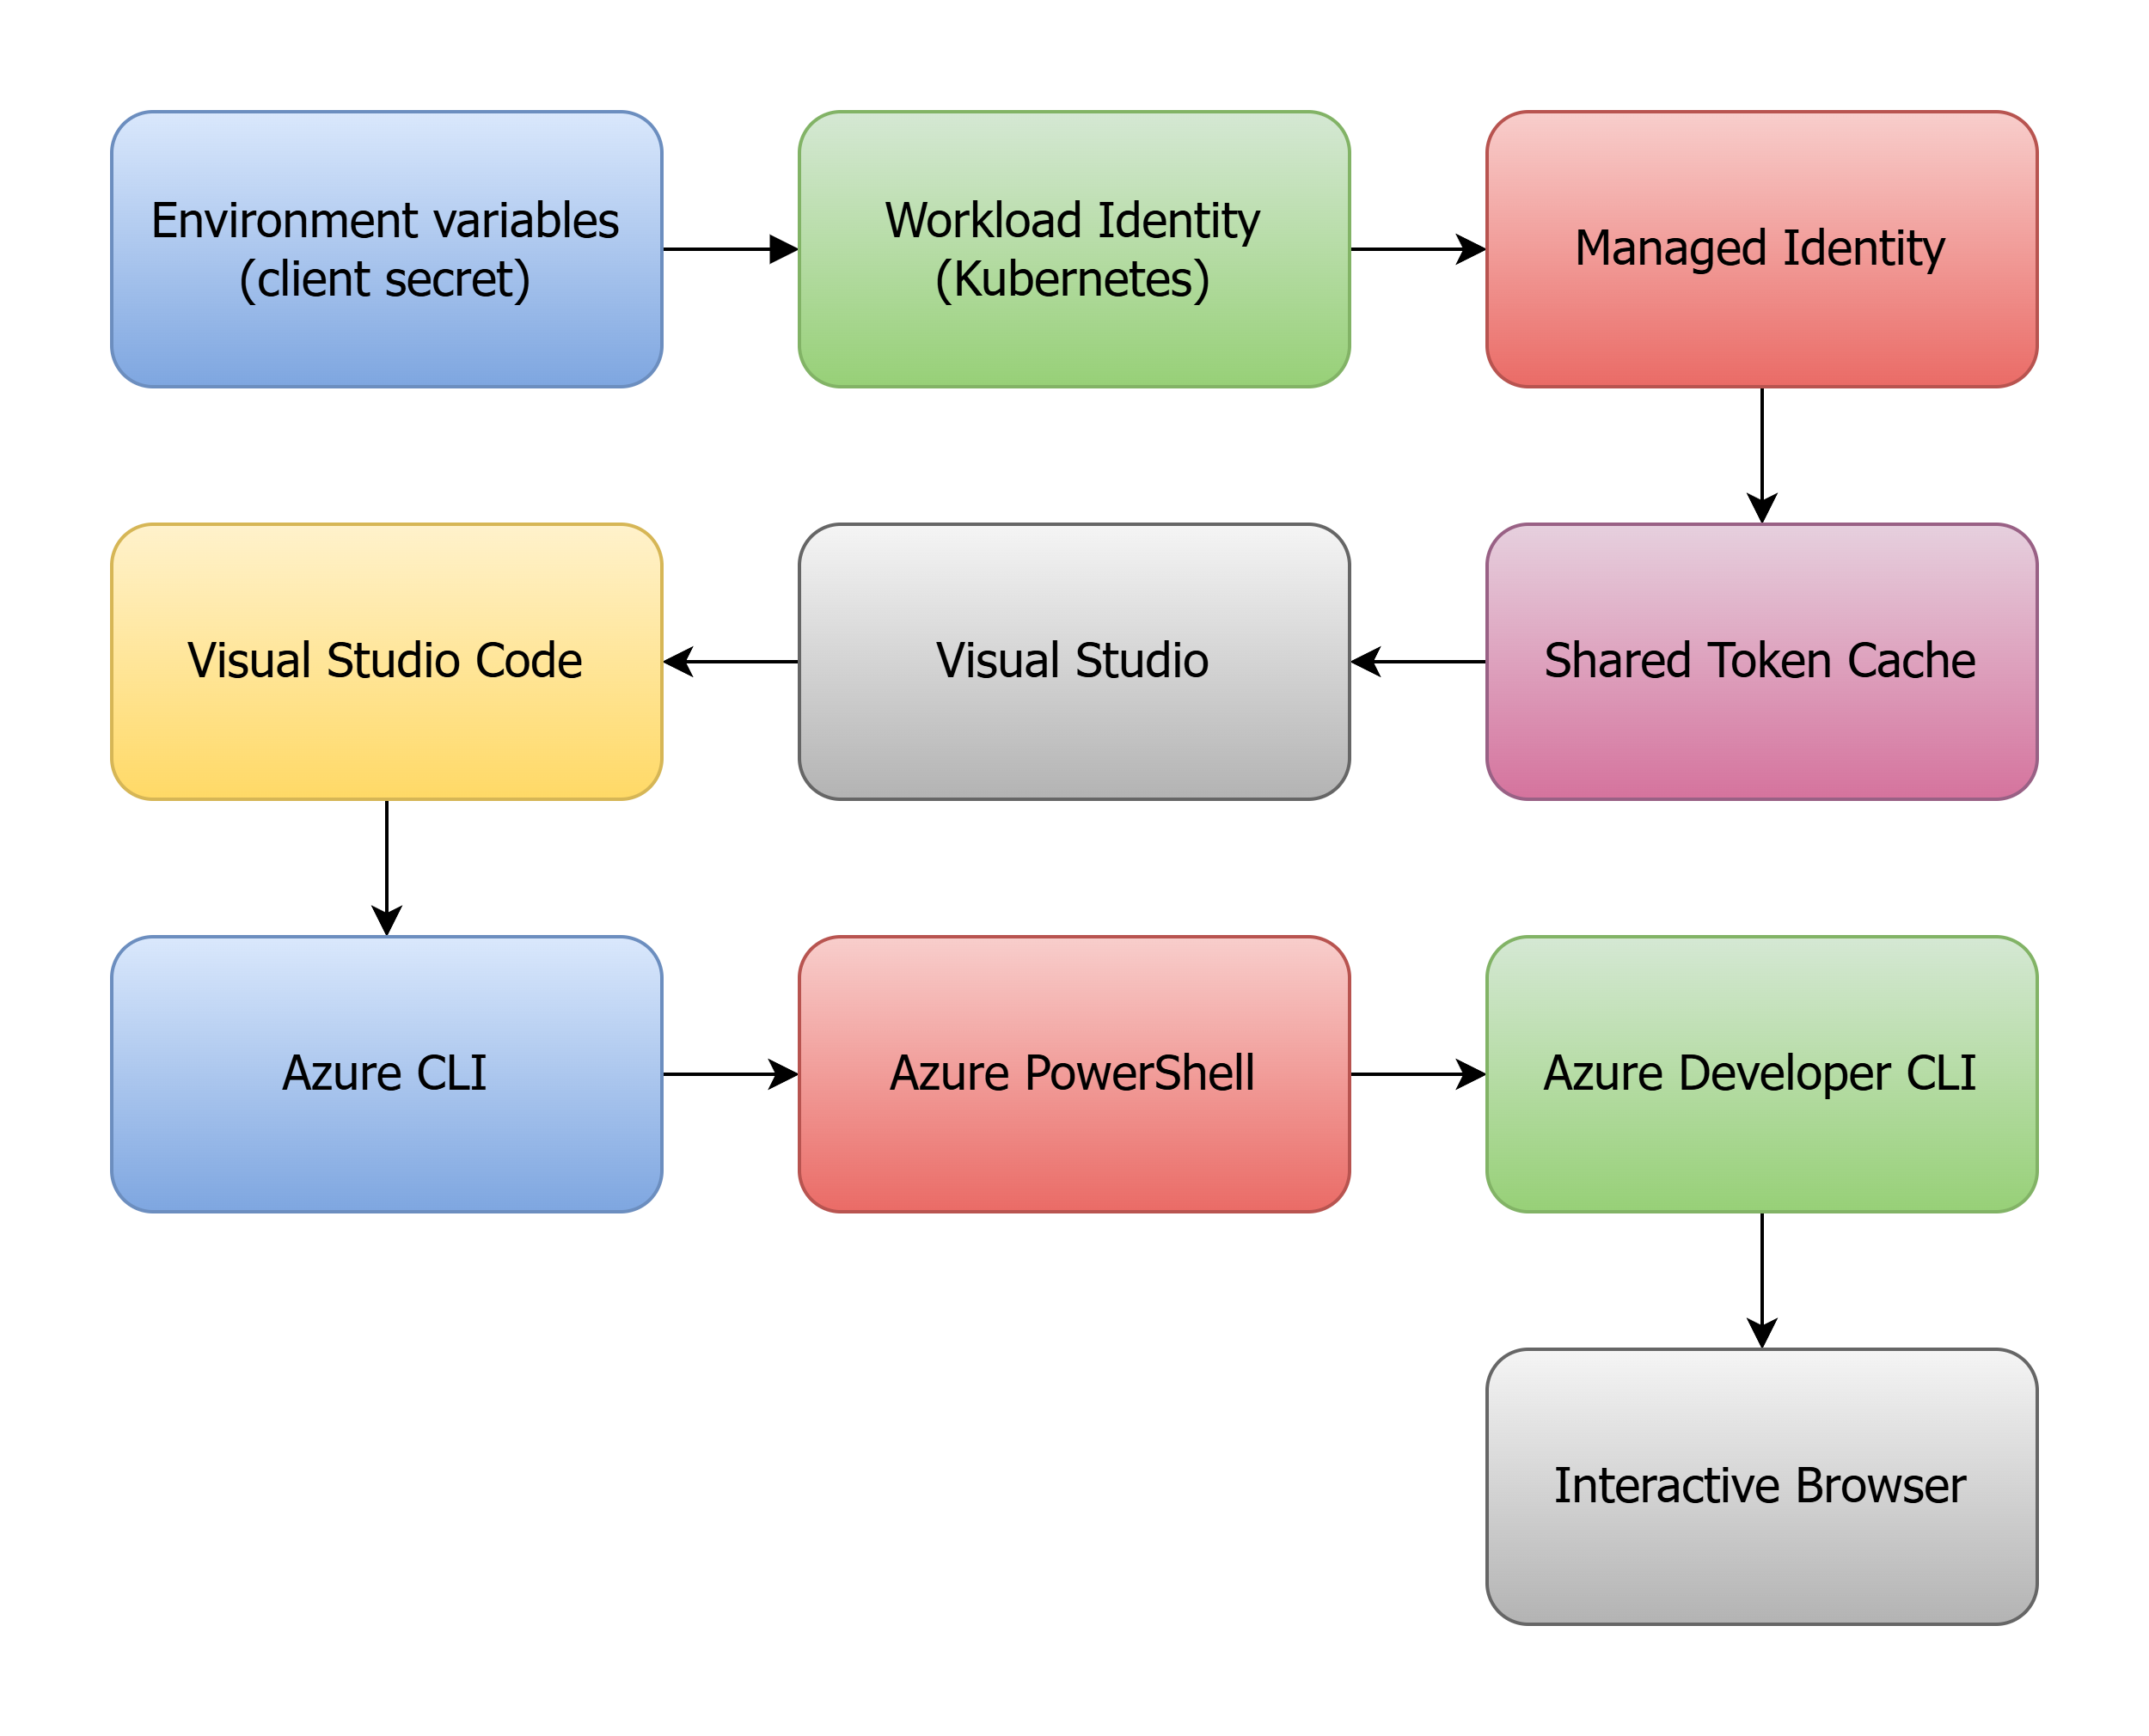
The DefaultAzureCredential tries to cater to all these scenarios by trying the following credential types in order:

The problem with this approach is that it can be slow 🦥, especially when running locally. Each credential type has its own way of obtaining an access token, and some of them require network calls or other expensive operations. This can lead to slow startup times for your application, which can be frustrating during development.
Understand your operating environments
It’s important to understand the different environments in which your application will run and how authentication should be handled in each one. For example, you may have different requirements for your production environment compared to your development environment:
Example environment
- Production - Managed identity
- Development - Azure CLI
By understanding these differences, you can optimize your authentication strategy for each environment.
Supply options to DefaultAzureCredential
One option to to provide options when creating a DefaultAzureCredential instance. This allows you to specify which credential types should be tried. This can help speed up the authentication process by skipping unnecessary credential types, however the order of the credential types is still the same.
var credential = new DefaultAzureCredential(new DefaultAzureCredentialOptions
{
    ExcludeEnvironmentCredential = true,
    ExcludeWorkloadIdentityCredential = true,
    ExcludeManagedIdentityCredential = false,
    ExcludeAzureDeveloperCliCredential = true,
    ExcludeSharedTokenCacheCredential = true,
    ExcludeInteractiveBrowserCredential = true,
    ExcludeAzureCliCredential = false,
    ExcludeVisualStudioCredential = true,
    ExcludeVisualStudioCodeCredential = true,
    ExcludeAzurePowerShellCredential = true,
});
Custom TokenCredential factory
Another option, and my preferred approach, is to create a custom TokenCredential factory that only tries the credential types you need. This can be especially useful when running locally, as you can skip the credential types that are slow or not needed. And it still maintains the benefits of running the same code for different environments.
public static class TokenCredentialFactory
{
    private static readonly TokenCredential[] Sources =
    [
        new AzureCliCredential(),
        new ManagedIdentityCredential()
    ];

    public static TokenCredential Create() => new ChainedTokenCredential(Sources);
}
This factory method creates a ChainedTokenCredential that tries the AzureCliCredential first, and if that fails, falls back to the ManagedIdentityCredential. You can customize this list of credential types to suit your needs.
Conclusion
By understanding the different environments in which your application will run and optimizing your authentication strategy accordingly, you can speed up the authentication and save your precious developer time. Using a custom TokenCredential factory is a great way to achieve this, as it allows you to skip unnecessary credential types and only try the ones you need. This can be especially useful when running locally, where you may not need all the credential types that DefaultAzureCredential tries by default.
